
|
Why Build the Passive The Building Process |
The Building Process
- Building a greenhouse is a wonderful way to learn a new skill if you are not already a carpenter. When I began, I couldn’t read a blueprint and had built nothing more complicated than a basic book shelf.
- The building process is a good way to engage your community. Many neighbors and local high school students assisted at various times, learning as they helped.
- Once completed, the greenhouse produces a lot of food year round, enabling a family to eat good home-grown organic vegetables regardless of weather conditions or grocery store availability.
Building the passive solar greenhouse
May-August
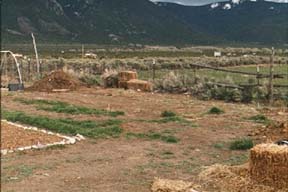
We began on a cold May morning by measuring the foot print of the building, orienting for southern exposure, and putting up the batter boards and string.
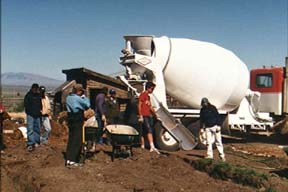
After the backhoe dug the perimeter trench, rebar was laid and tied for the footing. Then the cement truck came and friends and neighbors helped with the first pour.

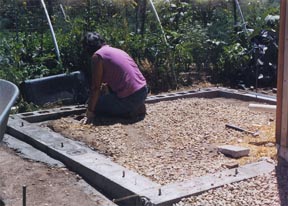
Foam forms and rebar went together like a modern day erector set, creating the insulated foundation. Here we are preparing for the slab (for the rear straw bale wall and the water wall) and foundation concrete pour.
The foundation and slab are done, including rebar for the first two courses of straw bales. Two of the six posts are in place for the post and beam rear straw bale wall. The large black object is the 1,225 gallon cistern.
Here we are tarring the plastic vapor-barrier where it pokes through the rebar, prior to the placement of the first row of straw bales.
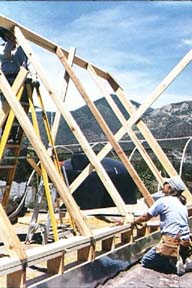
The sills or bottom plates are attached to the foundation with anchor bolts, the south knee wall has been built, and now we are erecting the south glazing wall. This was done in two sections and held in place by braces.
Next the east and west end walls were built, with cut-outs for vents and the fan. These side walls were attached to the rear post and beam wall. The straw bale wall was kept covered to keep it dry.
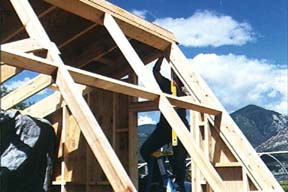
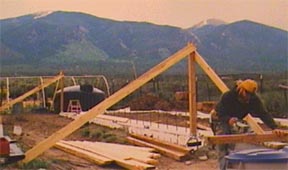
The south glazing wall frame is visible here with its purlins (the cross pieces) for fastening the polycarbonate (a type of tough, durable, light weight, transparent plastic). You can see one of the many collar ties, rafters, the first row of decking, and the outside wall (3/4 inch CDX plywood). Also, there is one of the door openings framed in and we are working on where the ventilation fan will be mounted.
This is a view of the rear of the greenhouse. We have finished the roof decking and are measuring our 15 pound roofing paper.
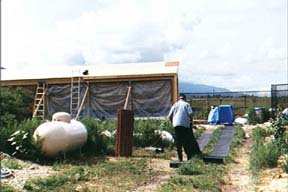
Here we are finishing the foundation for the cistern; which will collect water off the roof via gutters, and deliver the water to the plants by way of soaker hoses and drip irrigation.
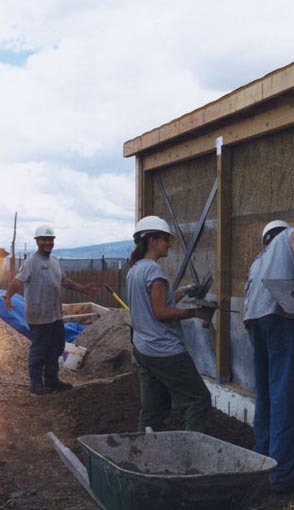
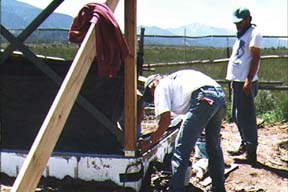
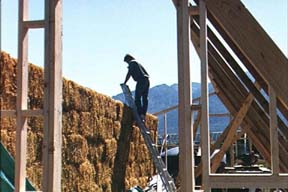
Local young adults are learning how to stucco as they put on the first coat of cement on the straw bale wall (inside and outside). They also put the first coat of wood sealer on the south glazing wall frame and the plywood on the east and west end walls.
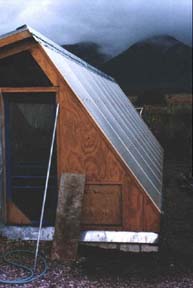
We’re in the home stretch! The polycarbonate is attached to the frame, complete with flashing and metal stops, the west wall screen door is hung, and one of the vents is in place. Later in the fall we installed the top solar vent, hung the outer door, put guttering along the bottom of the glazing wall, and dug in a stock tank to receive the water from the glazing wall.
Here’s the east side, with the aluminum fan shutter in place. Later in the fall we hung the outer door, made the lower vent, put the solar panel on the roof, and installed and hooked up the solar fan.Features
• Insulated foundation: you can add or subtract from our two feet of below grade insulated foundation to customize the greenhouse to fit your USDA zone and average winter climate.
• Rear straw bale wall: uses the waste of barley farming to create an inexpensive R-40 super insulated north wall.
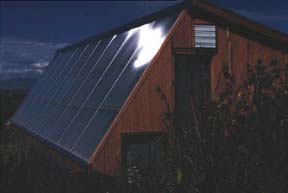
• Polycarbonate glazing: a difficult to break, lightweight glass alternative that is user-friendly, doesn’t burn the plants, and is guaranteed for ten years against yellowing, even at high altitudes.
• Super-insulated side walls and roof: uses newer, less itchy fiberglass and a foil/bubble wrap material that insulates (bounces back radiant heat), serves as a vapor barrier, and reflects light back toward the plants.
• A 1,225 gallon cistern: stores and recycles rainwater (plants preferred water source), a must for rural areas that lack a (reliable) well and a safeguard against drought and water rationing in these climatically uncertain times. The size can be adjusted to fit the rainfall pattern and amount in your locale.
• Passive solar water wall: 900 gallons of water in a combination of recycled white plastic and new black metal five gallon buckets. These store heat from the sun during the day (in winter) and release the heat to the air a night. In summer, the water helps keep the interior of the greenhouse cooler.
• Active solar fan and vent: uses the sun to run the ventilation system (augmented by human operated vents). The size, placement, and number of vents can be customized to fit your heat and humidity profile.
• Two growing beds: the interior of the greenhouse is about 35'4" long by 10' wide, or approximately 353 square feet (not including the water wall). The two beds are 4' wide and contain about 282.5 square feet of useful growing space for plants.